
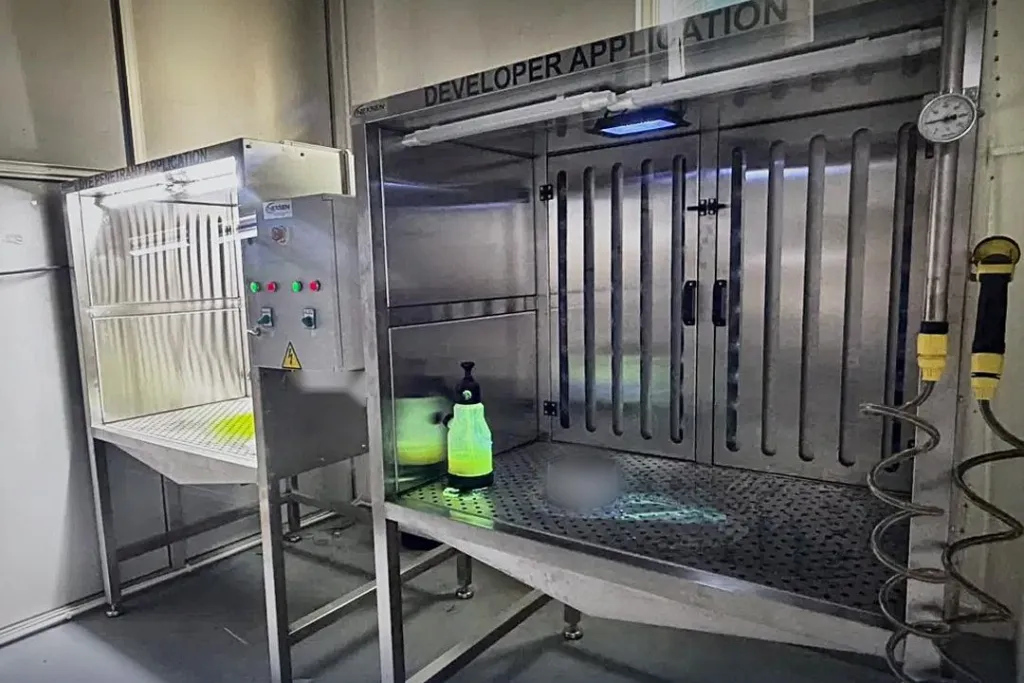
In aerospace maintenance and manufacturing, fluorescent penetrant inspection (FPI) is one of the most widely used non-destructive testing methods for finding surface-breaking discontinuities, from turbine blades to landing gear components. Its reliability depends not only on the quality of the penetrant materials but also on the equipment the process runs on: application must be controlled, washing must be carried out at the right pressure and temperature, intermediate checks must be made under suitable lighting, and the working environment must be kept clean.
NEXSEN has commissioned a penetrant inspection line designed and manufactured for a customer in the aerospace sector. Fully designed and built in Türkiye, the line consists of a penetrant application booth and a wash & developer booth. In this article we walk through each section of the line, its technical features and why it was configured this way for aerospace processes.
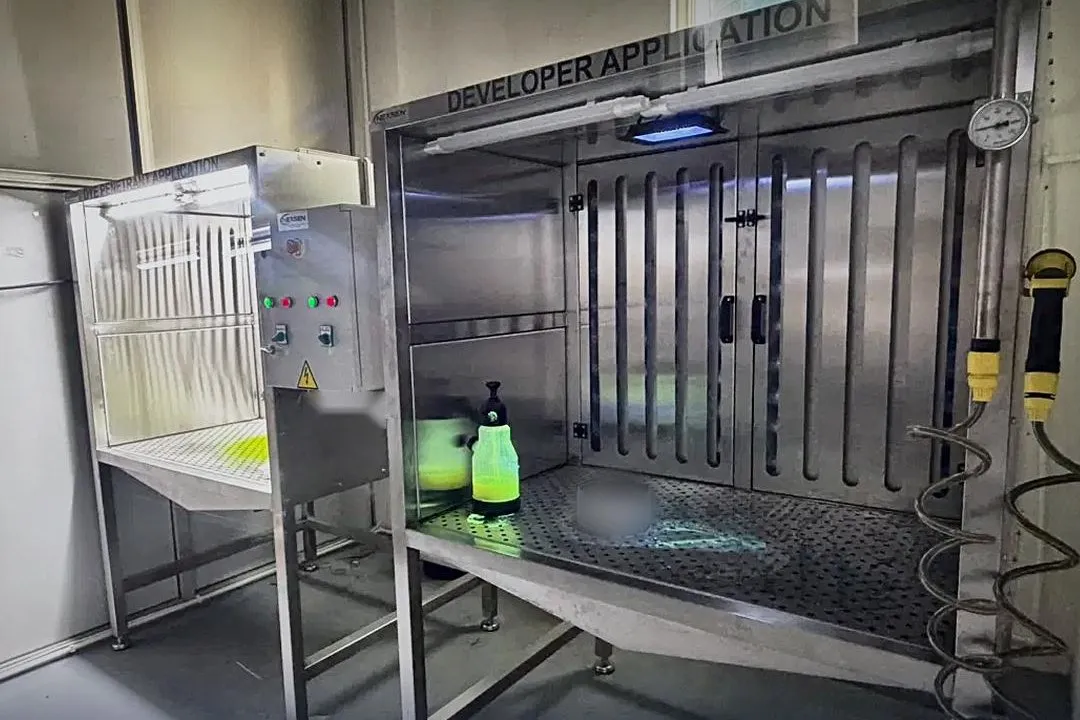
The line at a glance
- Two stations: a penetrant application booth and a wash & developer booth
- Stainless steel construction, perforated work table and drain-back hopper
- White light and UV-A lighting for intermediate checks
- Extraction motor in each booth, extraction slots on the rear panel and replaceable filter
- Water line with gauges, wash gun and coiled hose
- Lighting and extraction controlled from a single panel, with emergency stop
- Local design and manufacturing tailored to the aerospace customer’s process and layout
Why a dedicated penetrant line for aerospace?
In aerospace, penetrant inspection is performed against tightly defined requirements for materials, process and personnel. Documents such as AMS 2644 for penetrant materials, ASTM E1417 for process control and NAS 410 / EN 4179 for personnel qualification, together with the process specifications of aircraft and engine manufacturers, set this framework. These requirements also place demands on the equipment:
- Controlled, repeatable application: even coverage of the part and collection of excess penetrant during the dwell time.
- Controlled washing: water pressure and temperature that can be monitored, and the ability to follow the wash under UV light to avoid over-washing.
- A clean, safe workspace: penetrant vapour and developer dust drawn away from the operator, and contamination of the booth prevented.
- Easy maintenance: quick filter replacement and low consumable costs.
Each section of the line was designed around these needs. For the fundamentals of the method, see our article What is penetrant testing?
1. Penetrant application booth
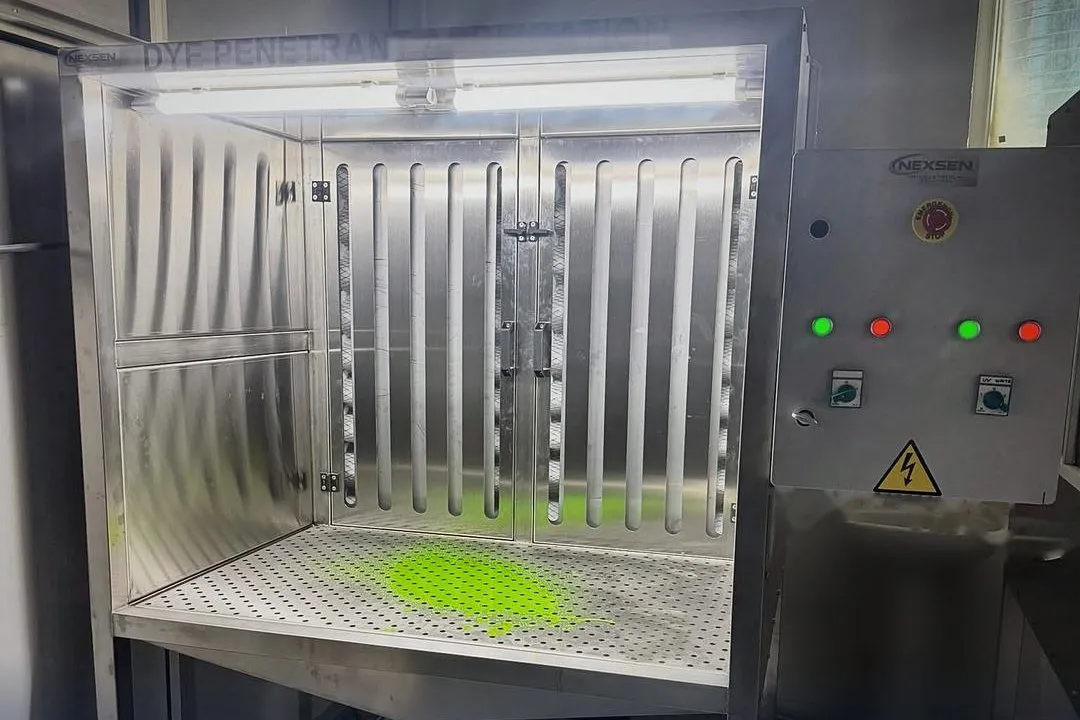
In the first stage of the process, penetrant is applied to the pre-cleaned part. The booth has twin-tube white lighting, so the operator can apply penetrant evenly and in a controlled way and see that every surface of the part is wetted.
Parts are placed on a perforated stainless steel table. Penetrant draining from the part during the dwell time is collected by the drain-back hopper beneath the table, keeping the work area clean and reducing material loss. Extraction slots on the rear panel and a replaceable filter carry vapour generated during application away from the operator.
The control panel next to the booth brings lighting, the extraction motor and the emergency stop together in one place. Penetrant can be applied by hand sprayer or with pressurised equipment such as our liquid penetrant spray gun.
2. Wash and developer booth
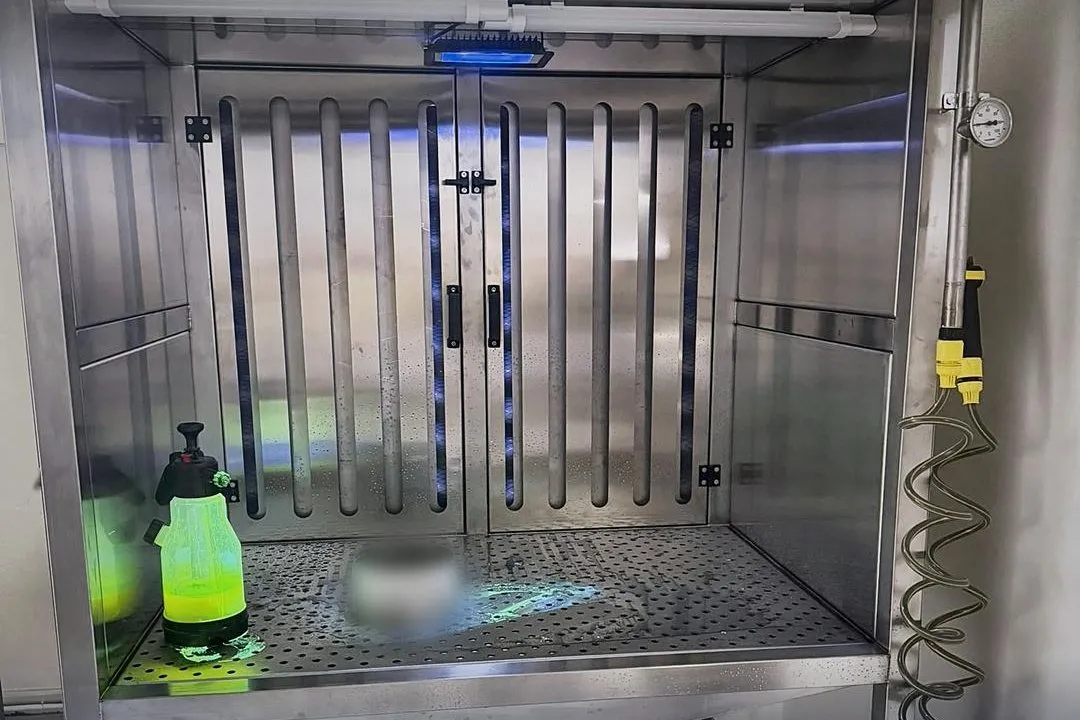
Once the dwell time is complete, the part moves to the wash station to remove excess surface penetrant. This is one of the most critical steps of FPI: under-washing leaves background fluorescence that causes false indications, while over-washing can pull penetrant out of a discontinuity and lead to a real crack being missed.
That is why the booth combines white light with a UV-A lamp. The operator can watch the part under UV during washing to confirm that excess penetrant has been removed. The water line with gauges and the wash gun make wash conditions visible. Aerospace process specifications define pressure and water temperature limits for manual water spray, and the gauges on the line make these values easy to monitor. The coiled hose gives the operator freedom of movement inside the booth.
After washing and drying, developer can be applied in the same booth. For processes using dry powder developer, the dry developer application gun helps achieve a thin, even coat. Extraction slots and a replaceable filter keep developer dust from spreading into the room.
3. Extraction and filtration: a clean, safe workspace
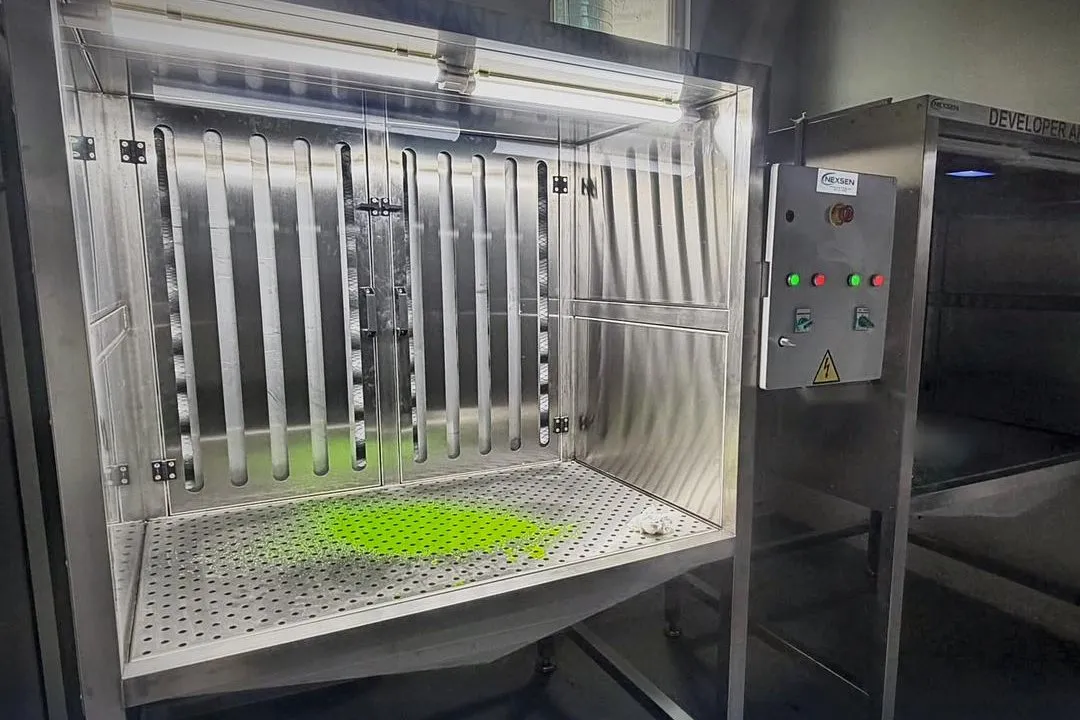
Both booths on the line have their own extraction motor. Air is drawn through vertical slots in the rear panel and passed through a replaceable filter. The filter is reached quickly through the hinged rear panel, so maintenance does not require dismantling the booth.
As a result:
- the operator is less exposed to penetrant vapour and developer dust,
- booth surfaces and the inspection area stay clean for longer,
- fluorescent contamination is reduced, helping avoid false indications from background,
- lighting and extraction are controlled from a single panel.
Process flow: where the line fits in FPI
A typical fluorescent penetrant process consists of the steps below. Our line covers steps 2 and 3 plus developer application; the remaining steps are completed with the facility’s existing equipment or with additional modules depending on the project:
- Pre-cleaning: removal of oil, paint, dirt and oxides.
- Penetrant application and dwell: in the penetrant application booth, under white light.
- Excess penetrant removal: in the wash booth, with controlled water spray under UV light.
- Drying: before or after developer, depending on the developer form used.
- Developer application: in the wash and developer booth.
- Inspection: evaluation of indications in a darkened area under adequate UV-A intensity.
- Post-cleaning.
For complete systems with dip tanks, emulsifier station, drying oven and darkened inspection booth, see our Penetrant Line (DPI / FPI Inspection Systems) page; for more compact needs, see the Penetrant Inspection System and Penetrant Inspection Cabinets pages.
Accessories for the inspection stage
An efficient line is completed with the right accessories. Our recommendations for inspection and process control:
| Need | Recommended product |
|---|---|
| Handheld UV-A inspection | DeltaFlux DF L SI 60 handheld LED UV lamp, DF L 6K rechargeable UV LED lamp |
| General UV lighting for inspection booths | DF L BG 600/1200 suspended UV LED lamp, DF L EB UV 50/100 stationary UV LED floodlight |
| Portable / field inspection | DF L KK 6000 AE portable UV LED lamp, DF L PX C SUP smart UV LED lamp with camera |
| Measuring UV-A intensity and ambient white light | DeltaFlux DF 2302.0 photoradiometer (UV-A / lux meter) |
| Daily system performance check | DeltaFlux DF SP 302 TAM panels |
| Penetrant and developer application | PT spray gun, dry developer gun |
See all accessories on the Penetrant Testing Accessories page, and the full range in the Penetrant Test Equipment group.
Advantages of local manufacturing
- Dimensions and layout specific to your facility: booth size, table height and panel position are set for your part family and floor space.
- Short lead time and fast commissioning: design, manufacturing and installation are handled by the same team.
- On-site service and spare parts: filters, lamps and consumables are supplied quickly from Türkiye, with on-site technical service.
- Calibration and training: UV lamp and radiometer calibration and operator training under one roof.
Frequently asked questions
Is this line only for fluorescent penetrant (FPI)?
The line was designed around our aerospace customer’s FPI process, but thanks to its white lighting it can also be used for visible (colour contrast) penetrant (DPI) work.
Can the booth dimensions be changed?
Yes. Booth width, depth, table height, lighting and extraction capacity are engineered to suit the size of the parts to be inspected and the facility layout.
How is the filter replaced?
Filters are accessible through the booth’s hinged rear panel; the panel is opened and the filter is replaced in a short time.
Can drying and a darkened inspection booth be added to the line?
Yes. Depending on process requirements, the line can be extended with drying, dip and inspection modules. See our Penetrant Line page for options, or get in touch with us.
Need a penetrant inspection line, workstation or booth? Share your part sizes and process with us and we will design the right solution for your facility together. Reach us through our contact page.